Did you know you can transfer INKJET printed images onto wood? Yes . . . this inkjet photo transfer to wood is easy with Mod Podge and regular school glue.
Skills Required: Intermediate Beginner. You should have prior crafting experience before attempting this craft; preferably with Mod Podge. It’s not necessarily hard, but it can get tricky so it’s best if you have experience with the materials.

Yep, you heard right! You can do an inkjet photo transfer to wood with just Mod Podge. I love transferring images to wood – they make these personalized rustic little pieces that are perfect to just sprinkle around the house or to give as a small personalized gift.
You don’t need a laser printer or photo transfer medium either for this tutorial. It’s different from the Mod Podge photo transfer medium in that it gives your image a clear background. Interested to see how I did it? Well, read on!
Inkjet Transfer
Supplies:
- Plastic Stencil sheet
- PVA Glue (normal school glue)
- Mod Podge Matte or Gloss
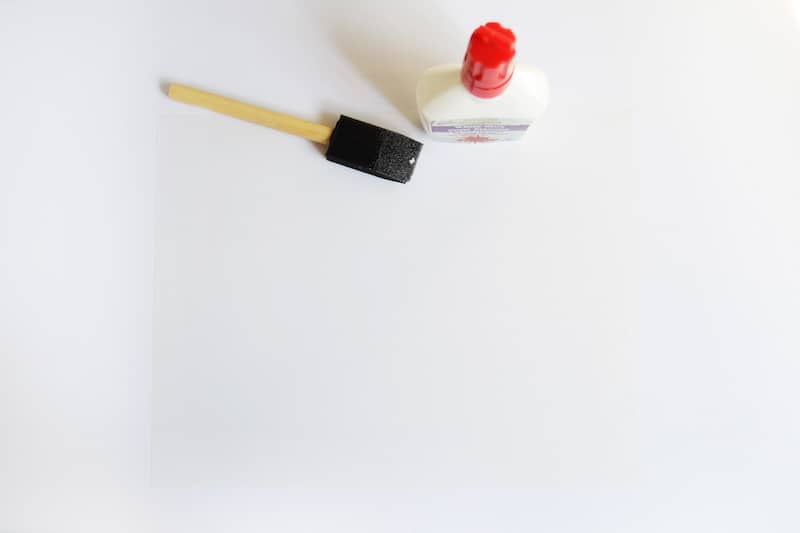
- Sponge brush
- Printer
- Wood block
- Wood stain
- Sandpaper
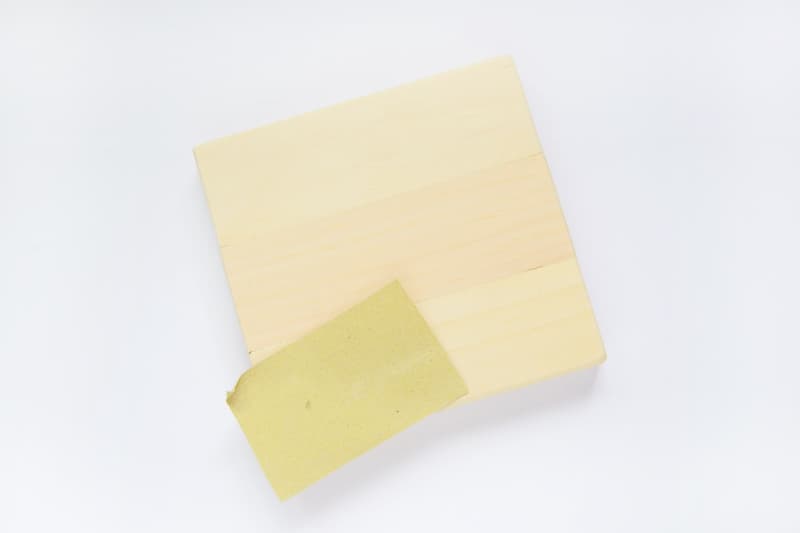
Step 1. Sand your wood block – you want the surface to be as smooth as possible for better photo transfer to wood.
Step 2. Paint two thin layers of glue onto the shiny side of your stencil sheet. You can use transparency films as well if that is what you have on hand. Once fully dry, print your image onto the glue covered stencil sheet with your printer.
Note: you’ll need to reverse the image if you want it to show up the way it is on screen OR if there’s text.

Step 3. Allow the printed image to FULLY DRY before proceeding onto this step – paint a layer of Mod Podge onto the wood block and carefully lay your image on top.
Using the stencil sheet will allow you to align it much easier with the wood edges. Smooth slightly with your hands.
Step 4. Wait until the Mod Podge is dry on your photo transfer to wood (I let mine dry overnight – 24 hours is recommended).
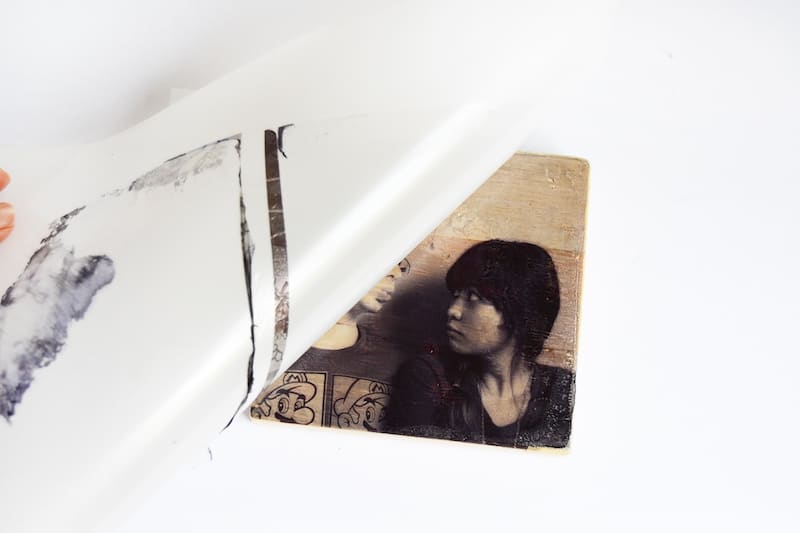
Lightly run the tip of a craft knife onto the sides of the wood before peeling to separate the image from the rest of the glue that dried. Peel carefully, again making sure your image is fully dry or it won’t transfer perfectly.

Step 5. Stain the sides and the back of the wood block and let that dry and you’re done!


This simple tutorial photo transfer to wood does take time, but it gives fantastic image transfer results without the hassle of wetting the image and rubbing the paper off. The stencil sheet can also be used again!
What image would you transfer? Have fun crafting and don’t forget to follow me on social media or my blog for more ideas, freebies and tutorials!

Inkjet Photo Transfer to Wood
This inkjet photo transfer to wood is easy with Mod Podge and regular school glue. Do it in five simple steps!
Materials
- Plastic stencil sheet
- PVA glue (normal school glue)
- Mod Podge Matte or Gloss
- Wood block
- Wood stain
Tools
- Sponge brush
- Printer
- Sandpaper
Instructions
- Sand the wood block - you want the surface to be as smooth as possible for better image transfer.
- Paint two thin layers of glue onto the shiny side of the stencil sheet. You can use transparency films as well, if that is what you have on hand. Once fully dry, print the image onto the glue covered stencil sheet with the printer. Allow the printed image to FULLY DRY before proceeding to the next step.
- Paint a layer of Mod Podge onto the wood block and carefully lay the image on top. Using the stencil sheet will allow you to align it much easier with the wood edges. Smooth slightly with your hands.
- Wait until the Mod Podge is dry on the inkjet transfer to wood (I let mine dry overnight - 24 hours is recommended). Lightly run the tip of a craft knife onto the sides of the wood before peeling to separate the image from the rest of the glue that dried. Peel carefully, again making sure the image is fully dry or it won't transfer perfectly.
- Stain the sides and the back of the wood block and let that dry to finish.
This inkjet transfer project was inspired by another inkjet photo transfer we spotted at Photojojo!
The post Inkjet Photo Transfer to Wood with Mod P... appeared first on Mod Podge Rocks.