Learn the easiest way to make a handprint ornament! Christmas handprints are a favorite with small children! Make special memories with these three cute and easy Christmas craft ideas. So fun for kids and they make great gifts. Santa, Christmas tree, and Reindeer ornament options.
Skills Required: Beginner. You’ll be rolling out clay, adding a child’s handprint, and then painting. You can choose to paint or your child can paint these Christmas handprints. It’s really up to you!

I’ve got an awesome tradition that you absolutely need to start for Christmas – while your children or grandchildren are young. Make a handprint ornament!
Handprint Ornament
This is a tradition that my mom and I started with my niece this year, and we wish we would’ve started when she was very young (she’s 5 now).
Christmas Handprints
We have dreams of a handprint Christmas tree with tons of handprint ornaments all over it that start small and get bigger. I wonder if my niece would let us make ornaments with her hands until she is 18?
That might be cute but I don’t know that she’d be up for it! It’s a fun idea though, don’t you think?
In this tutorial, you’re going to learn how to make a Santa handprint, a reindeer handprint, and a Christmas tree handprint – the easiest way possible. These are such a fun memory for the holiday season.
Handprint Christmas Ornaments
I’m going to show you the easiest way to make a handprint ornament below. You don’t have to mix anything, which is okay by me! I’m showing you how to make a Santa handprint, a Christmas tree, and a reindeer ornament the easy way. These are SO cute! Here’s how it’s done.

(don’t forget to check out our other easy holiday handprint crafts!)
Gather These Supplies
- Crayola air dry clay
- Rolling pin
- Acrylic paint – washable/kid safe like Apple Barrel
- Mod Podge Gloss, Matte, or Satin (to seal) – I also used Mod Podge Sparkle on the Christmas tree
- Paintbrushes
- Knife or craft knife
- Scissors
- Mini pom poms
- Sparkly foam
- Wiggly eyes
- Baker’s twine
- Hot glue gun
- Sharpie
You’ll also want a cookie sheet and wax paper – trust me on this one.
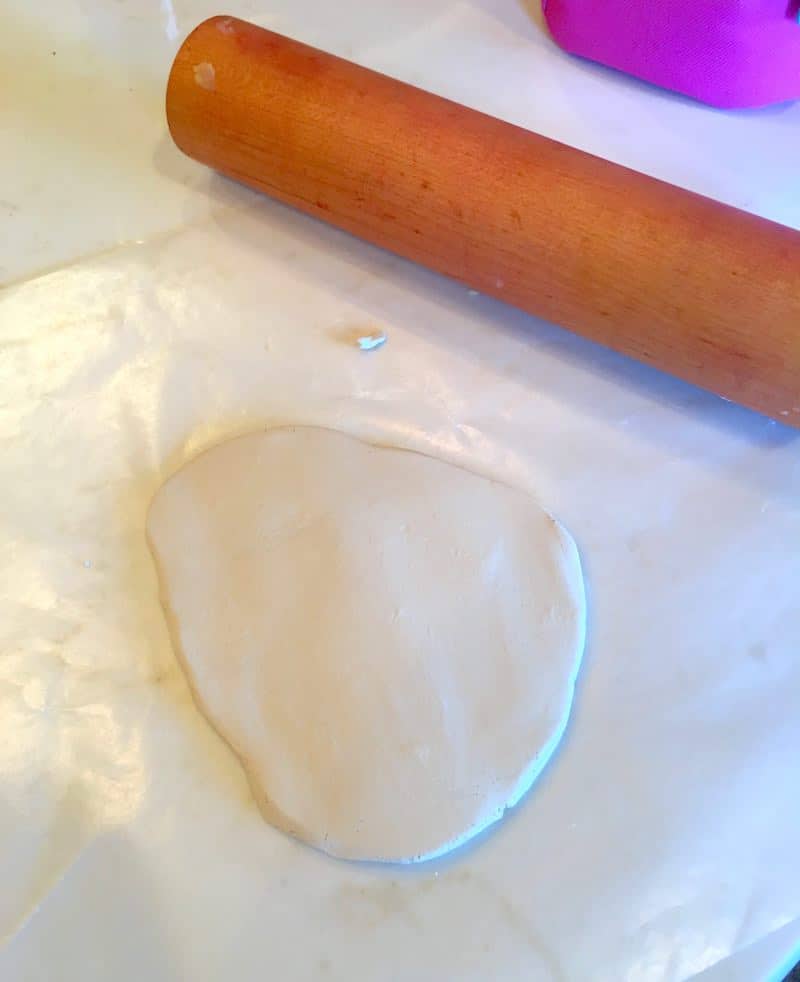
First thing you’ll do is grab a “hunk” of the clay and place it on the wax paper. The amount you’ll need just depends on the size of the hand or foot you’re imprinting. You’re going to roll out the clay to about 1/2″ thick. If you find the clay you’ve rolled out isn’t big enough, add more!
I actually picked the clay up, adding more, and rolled it out again as opposed to smushing another piece on the end and creating a line.
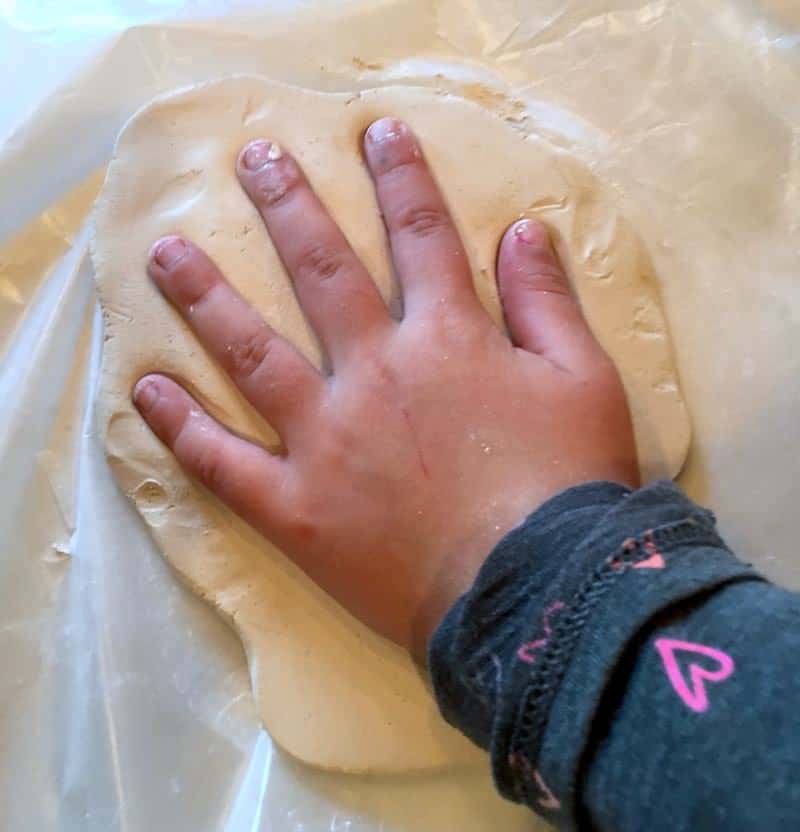
Place the hand down into the clay and push. You’ll probably want to help toddler age or small children with this by pushing each individual finger and then the base of the palm down.
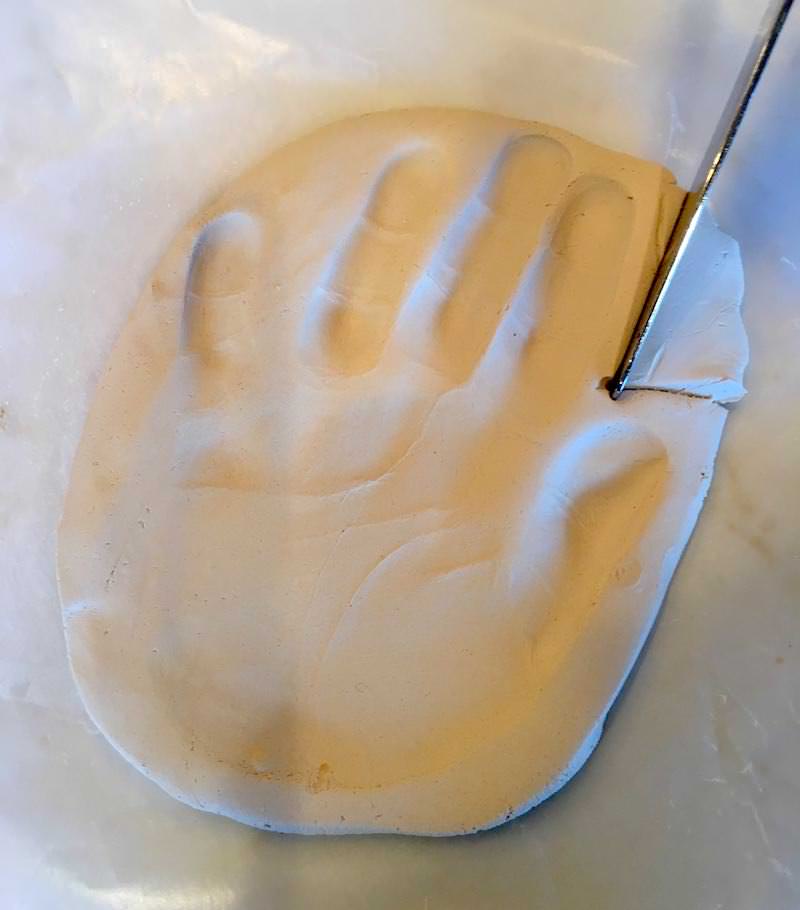
Pull the hand out of the clay and then cut around the edge. Now – you can give your littles non-sharp knives and let them do this part depending on their ages. Otherwise, mom or dad or another adult should be cutting.
We did a handprint reindeer, Santa handprint, and a Christmas tree handprint. The only real change we made was to spread my niece’s fingers a little differently for the reindeer (you can see in the photo of the finished ornament).
THEN let your clay dry. This is the long part that takes at least overnight and can take longer if you live in a humid area. Instructions on my container said DO NOT BAKE!! That’s where having the wax paper and cookie sheet came in handy.
I simply laid all the Christmas handprints on the wax paper and slid them onto the cookie sheet where I could easily transport them from location to location in my craft room if needed.
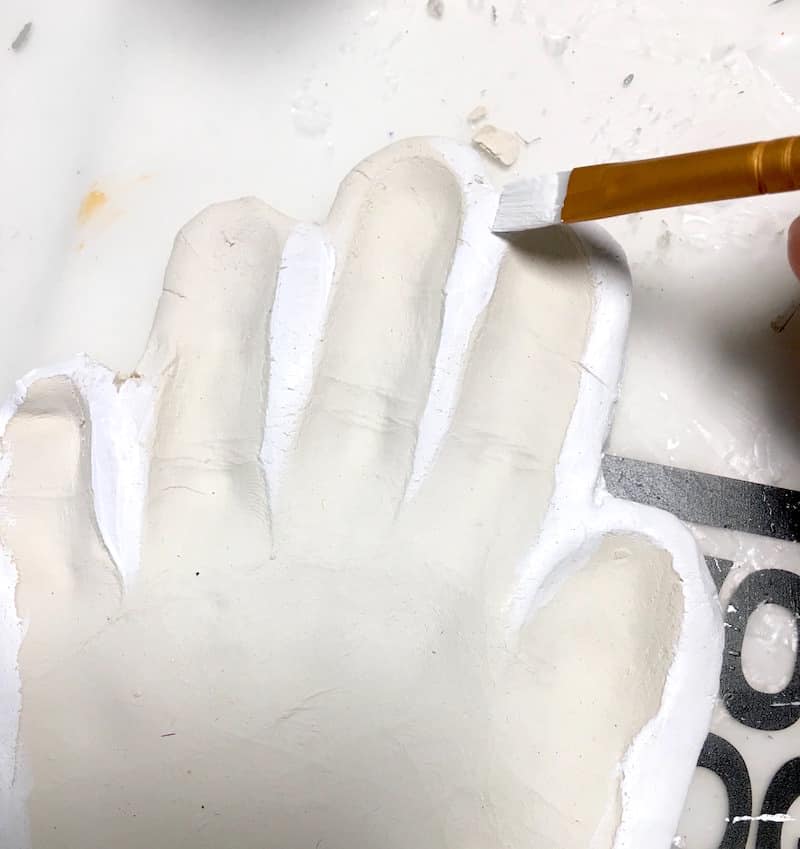
Once your handprints are fully dry, start painting! Note that the clay is NOT white – so if you want the edges white like I did (to make the painting pop), then you’ll have to use white acrylic paint.

Paint your handprint ornaments with the acrylic paint colors as shown in the photos. Of course you can use any colors you like, and you can paint them or your kids can do them. I’ll leave that up to you!
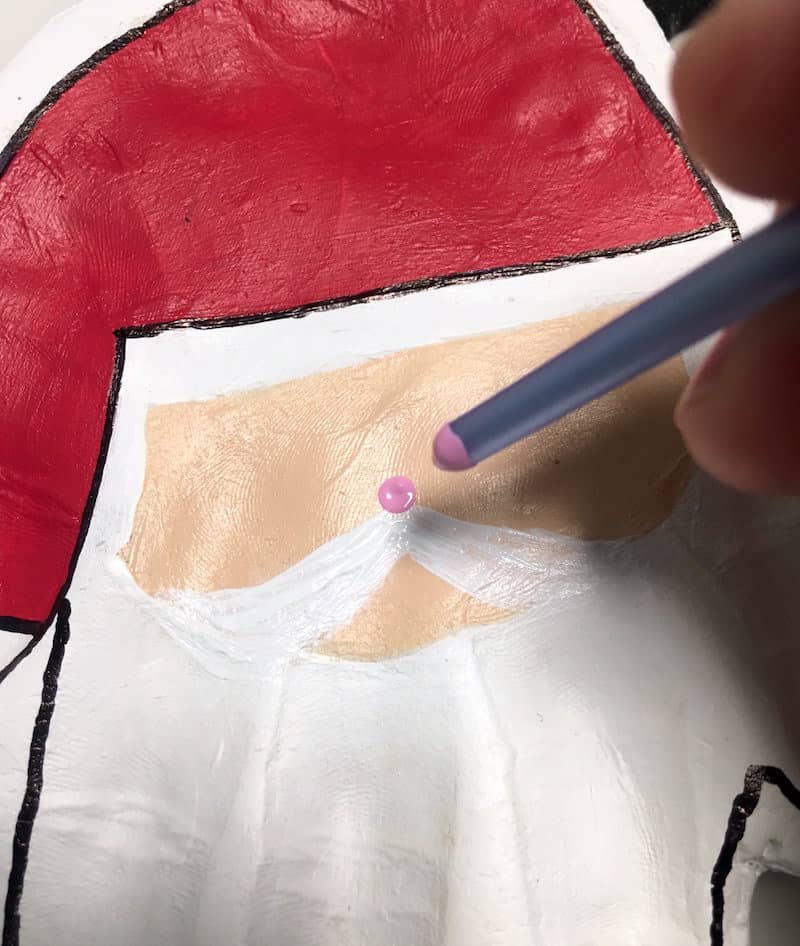
Don’t forget to add accents like Santa’s nose. I also used a Sharpie on the Santa handprint as you can see, to trace around the edges and accent the beard and hat. Then I used the Sharpie to draw a face on the reindeer ornament.
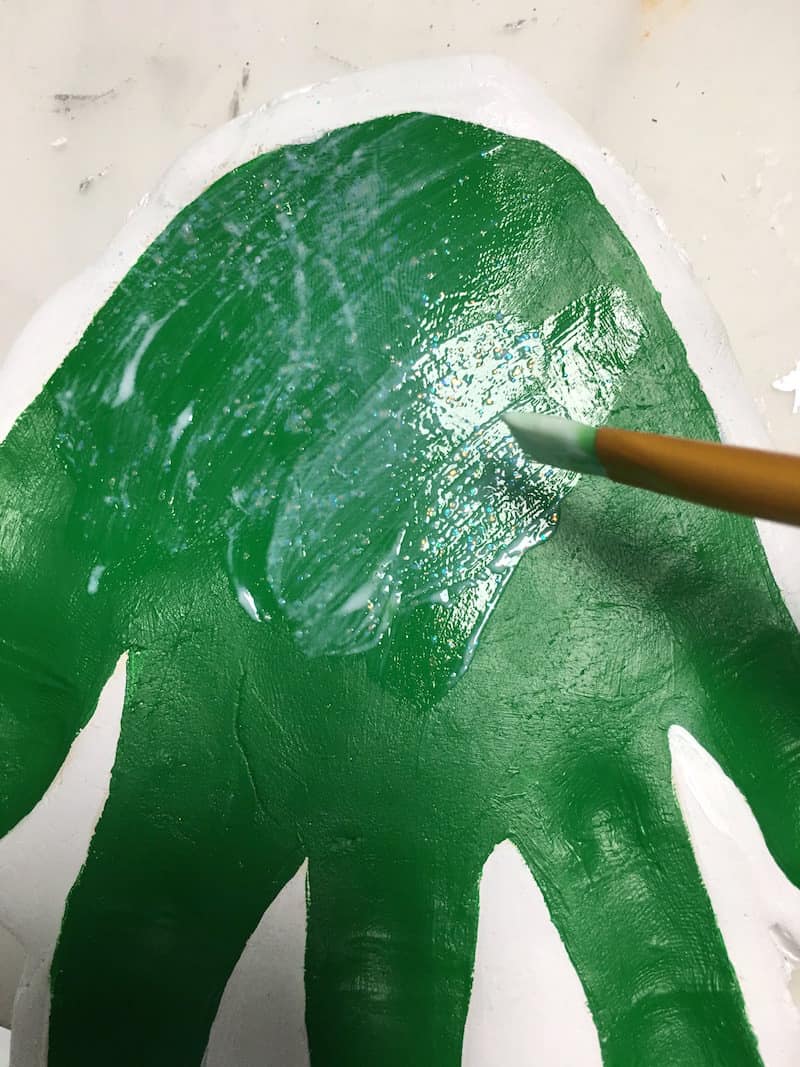
Seal your handprint ornament with Mod Podge. I used regular Gloss on the reindeer and the Santa, but I used Mod Podge Sparkle on the Christmas tree!
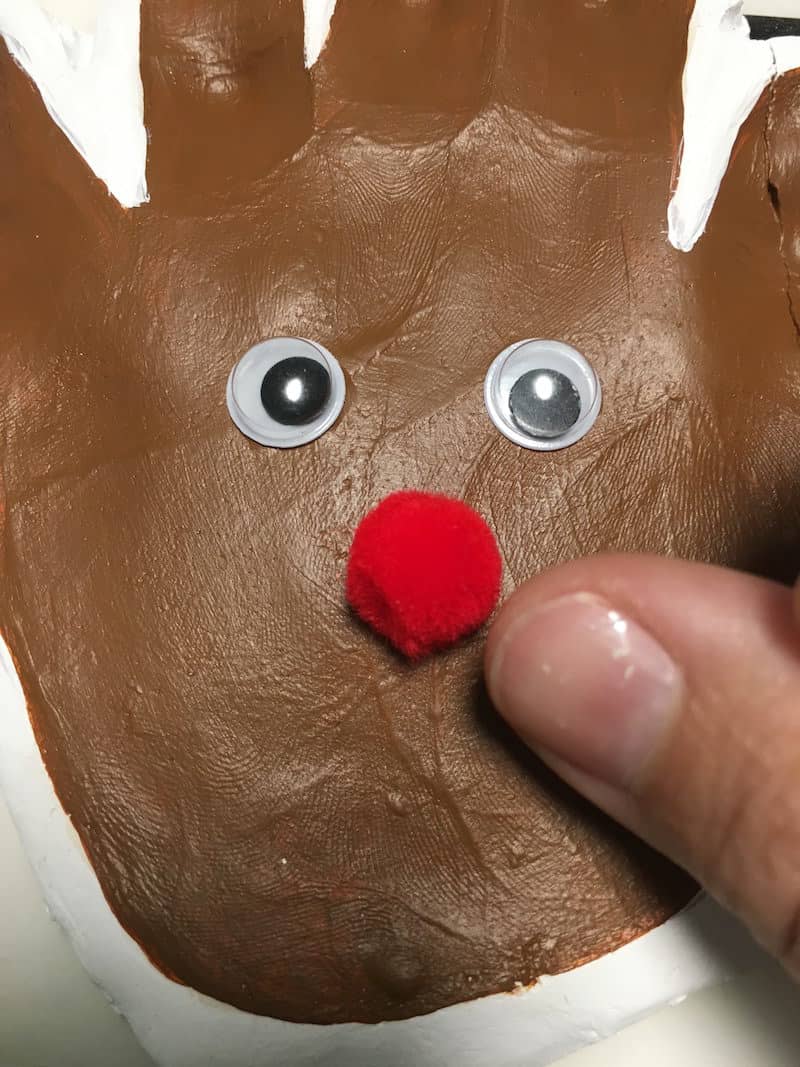
After the Mod Podge has dried, add embellishments with your hot glue gun. Add wiggly eyes, pom pom noses, pom pom ornaments, and even cut a star out of craft foam for the tree!
Then cut a length of baker’s twine and hot glue to the back. One thing I did was stick the baker’s twine into a hot glue dab I put on the back of the ornament, then put more hot glue on top to really secure it. The handprint ornaments are kind of heavy and I didn’t want them falling off the tree.
Here are my finished Christmas handprints:
Handprint Christmas Tree

Reindeer Handprint

Santa Handprint

What do you think of these Christmas handprints? Which handprint ornament is your favorite? I’d love to know in the comments!

Handprint Ornament
Make these handprint Christmas ornaments using this simple tutorial! This is a very easy craft to do with children, and you'll also be making holiday memories.
Materials
- Crayola air dry clay
- Acrylic paint – washable/kid safe like Apple Barrel
- Mod Podge Gloss, Matte, or Satin (to seal)
- Mini pom poms
- Sparkly foam
- Wiggly eyes
- Baker’s twine
- Sharpie
- Wax paper
Tools
- Rolling pin
- Paintbrushes
- Knife or craft knife
- Scissors
- Hot glue gun
- Cookie sheet
Instructions
- Break off a “hunk” of the clay and place it on the wax paper. The amount you’ll need depends on the size of the hand or foot you’re imprinting.
- Roll out the clay to about 1/2″ thick. If you find the clay you’ve rolled out isn’t big enough, add more.
- Place the hand down into the clay and push. Help toddler age or small children with this by pushing each individual finger and then the base of the palm down.
- Pull the hand out of the clay and then cut around the edge.
- Lay the clay ornaments out on the wax paper, then on top of the cookie sheet. Let dry overnight (this can take longer if you live in a humid area). DO NOT BAKE.
- Once the handprints are fully dry, paint them with acrylic paint. Use any colors you like; let dry.
- Seal the handprint ornaments with Mod Podge and let dry.
- Add embellishments with the hot glue gun and craft glue. Cut a length of baker's twine and hot glue to the back to hang.
- Let your ornaments dry completely before hanging.
Notes
I also used Mod Podge Sparkle on the Christmas tree.
The post How to Make a Handprint Ornament the Eas... appeared first on Mod Podge Rocks.