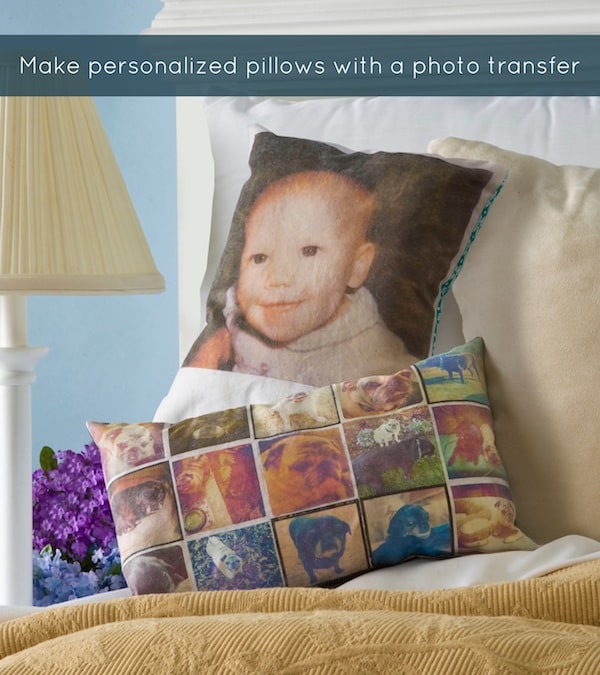
Use your Instagrams to create these unique, personalized photo pillows. It’s easy to do with Mod Podge! Don’t forget to scroll down to the bottom of the post to see a video of how a picture pillow comes together.
Skills Required: Intermediate. Using photo transfer medium takes a little trial and error. I’d try it on a scrap of fabric first with one small image to practice before you try making the larger pillow. I offer some tips in the post below.
I may have a problem with Instagram, in that I’ve used it to take TONS of pictures of my pets. So if you are are following my stream and think “this lady is crazy,”, I’m sorry. Guilty as charged!
The only problem I have with all of these Instagrams is that they just sit on my phone, and I never (rarely?) do anything with them. These photo pillows apply to those Instagrams (or any smartphone photos, really).
Picture Pillows
I also love those old Polaroids that my parents have that just sit in the drawer, so here’s a chance to pull those out too. And what do you use to make these photo pillows? Mod Podge Photo Transfer Medium. It’s an awesome product, seriously.
Picture Pillow Perfection
If you want to make sure your pillows turn out perfectly, you’re going to need patience.
I’m assuming you let your personalized photo pillows dry for 24 hours before using any water to rub off the design – that is the most important first step.
When your design is dry, you’ll wet it in the sink and rub off the paper. Use light to medium pressure, not too hard . . . because you can always let it dry, re-wet, and then rub a little more paper off.
Remember that the photo is going to have a bit of a vintage look when it’s transferred.
Are you ready to learn how to make a picture pillow? Keep reading!
Personalized Photo Pillows
Gather These Supplies
- Mod Podge Photo Transfer Medium
- Computer with a dry toner printer or copies made on regular paper (not photo paper)
- Photos of your choice
- Foam brush
- Mod Podge silicone mat
- Sponge and water
- A pre-made cotton pillowcase OR:
- Fabric – I used white cotton for the front of the pillows and patterned scraps for the back
- Pillow fill
- Sewing machine with thread
- Needle and thread

Print out your favorite photos – in the size that you want for your pillow. I scanned in some old Polaroids and enlarged them . . . and I also created a photo mosaic using some Instagrams. You can make one large image, print out several images, or create a collage as I did.
Print out the images on a dry toner printer or get copies made. I recommend testing all inkjet printers before doing your photo transfer.
Wash and dry your fabric and iron it. I used white cotton fabric for the photo transfer because I wanted the photos to show up vibrantly.
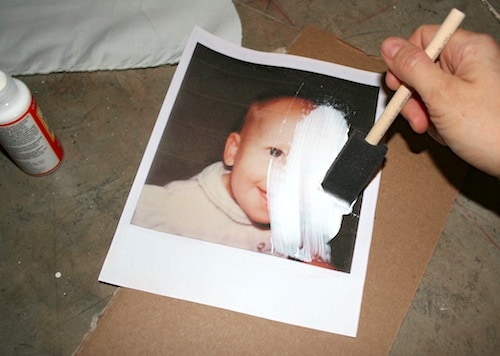
Apply a medium layer of Mod Podge Photo Transfer Medium to the front of the image that you would like to transfer.
You need to apply enough so that you cannot see the image. I used a cereal box part to cover my surface, but I recommend a silicone mat instead.
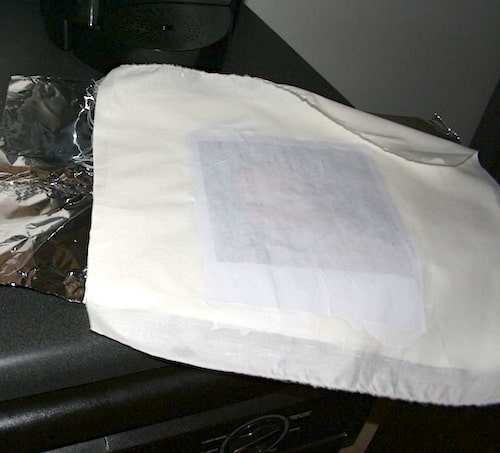
Quickly put the covered image face down onto the white fabric and smooth. Wipe away any photo transfer medium that squeezes out the sides. Repeat for remaining photos. Let dry for at least 24 hours (this is really important!).
When the 24 hours is over, wet the paper slightly with water and rub the paper off of the photo transfer. Repeat until all of the paper is rubbed off of the transfer and then let dry. Make sure to read the package instructions.
If you need to sew your fabric into a pillowcase, you can move forward with the following steps.
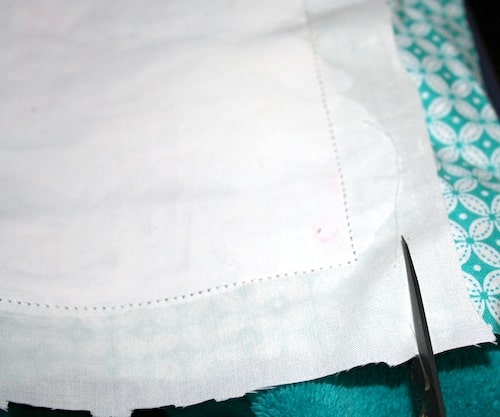
Place the photo transfer face down onto the right side of the fabric that you are going to use for the pillow and sew, leaving a small hole so that you can pull it inside out.
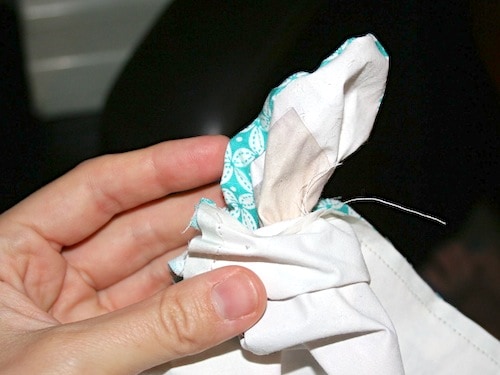
Turn the pillow inside out so that the photo transfer is now on the outside of the pillow. Stuff the pillow with the fill until you are satisfied with the size. Make sure to stuff into the corners.
Fold the edges of the hole over and use the needle and thread to close (you can use a sewing machine as well).

Display your picture pillow or give them as gifts. Be a weird dog (or cat) lady like me and make tons with your animals on them. They are so fun to create!

Picture Pillow
Learn to make a DIY photo pillow with Mod Podge photo transfer medium! I made this custom pillow with my Instagrams.
Materials
- Mod Podge Photo Transfer Medium
- Photos of your choice
- Foam brush
- Mod Podge silicone mat
- A pre-made cotton pillowcase OR supplies to make a pillowcase
Tools
- Computer with a dry toner printer or copies made on regular paper (not photo paper)
- Sponge and water
Instructions
- Wash and dry your fabric or pillowcase.
- Print out photos in the size that you would like them for your pillow. You can make one large image, print out several images, or create a collage as I did. Print out the images on a dry toner printer or get laserjet copies made.
- Apply a medium layer of Mod Podge Photo Transfer Medium to the front of the image that you would like to transfer. Apply enough so that you cannot see the image.
- Quickly put the covered image face down onto the fabric or pillowcase and smooth. Wipe away any photo transfer medium that squeezes out the sides. Repeat for remaining photos. Let dry for at least 24 hours.
- Wet the paper slightly with water and rub the paper off of the photo transfer. Repeat until all of the paper is rubbed off of the transfer and then let dry.
- If you need to sew the fabric into a pillowcase, do that at this time. Stuff your pillow with fiberfill or insert a pillow into the case to finish.
Are you ready to see a video that will show you how to make a picture pillow? Simply press “PLAY” below:
If you love these photo pillows, check out these other photo transfer projects you’ll love:
- How to Transfer Photos to Wood
- 30 Mod Podge Photo Transfer Crafts You’ll Love
- Photo Transfer to a Wood Block
The post Photo Pillows with Mod Podge Photo Trans... appeared first on Mod Podge Rocks.