Inspired by my childhood, I created a DIY bean bag toss game using clay saucers and a printable. This bean bag game is easy to assemble and you’ll have a blast!
Skills Required: Beginner. You’re going to paint, cut out a printable, and apply the printable to terra cotta pot saucers with adhesive. Very easy.
I grew up in a family of five children, and we used to get tossed outside in the summer. “Go play!” my mom would say . . . so we made up a lot of games, rode bikes, and took hikes by the lake. Which now that I think about, wasn’t actually a lake, but was a huge reservoir for runoff. It seemed big at the time :0
I always loved being outside with my brothers, and we had a few games that were our favorites. One of them was tossing tennis balls into buckets, and giving ourselves “points” depending on the bucket we were able to reach with the balls. Inspired by that childhood game, I created a DIY bean bag toss using clay pot saucers and a printable.
This bean bag game is SO easy to assemble and you’ll be having a blast in minutes! Children can help make this too, before they play.
You can play with as many people as you like, but I find this bean bag toss game is most fun playing with two people in rounds. You can do a tournament bracket if you like!
Make Your Own Bean Bags
I purchased bean bags because my sewing machine was in the shop at the time I wanted to complete my bean bag toss game. Had my sewing machine been available, I would’ve made them myself out of cotton duck material (available at Jo-Ann or a similar fabric store). The bean bags I purchased were 5″ x 5″ squares – though apparently “regulation” beanbags are 6″ x 6″ square.
One yard of cotton duck material makes about 20 bean bags at 6″ x 6″, and you’ll probably want to make a few different colors so scoring is easy to keep track of. You’ll cut out squares 1″ larger than you want your finished bags and use a double stitch or zigzag to reinforce them.
Each bag should contain approximately 1-3/4 cup of corn to weigh between 15-16 oz, which is regulation for cornhole. So yes, you can use these bean bags with cornhole as well!
Storing Your Bean Bag Game
This DIY bean bag toss game uses Mod Podge Outdoor. I mention in the instructions that it is the better bet if you want your bean bag game to last year after year.
The only issue is that I find that Mod Podge Outdoor sometimes stays tacky for quite awhile (because of cure time), especially in humid environments.
I recommend using a spray or brush on sealer over the top if you want the bean bag game to be able to be stacked for storage.
If you want to leave this game out in the sun, use Outdoor Mod Podge and then a UV resistant or brush on sealer. That way the sun won’t fade your project.
Are you ready to learn how to make this DIY bean bag toss game? Keep reading!
Protect your work surface and place your clay saucers down. Spray them evenly with paint and let dry for at least 20 minutes. Turn over and repeat. Continue doing this until your saucers are evenly covered on both sides and dry. Always remember to spray in a well ventilated area!
Of course if you have acrylic paint on hand, you are welcome to use it to paint these saucers. Honestly I’m more of a painter than a spray painter. I don’t have the patience that comes with using spray paint, so acrylic paint it is! You can use a multisurface or outdoor version.
Tip: paint six saucers if you’d like to use the 100 point value in addition to the 10 – 50 option shown.
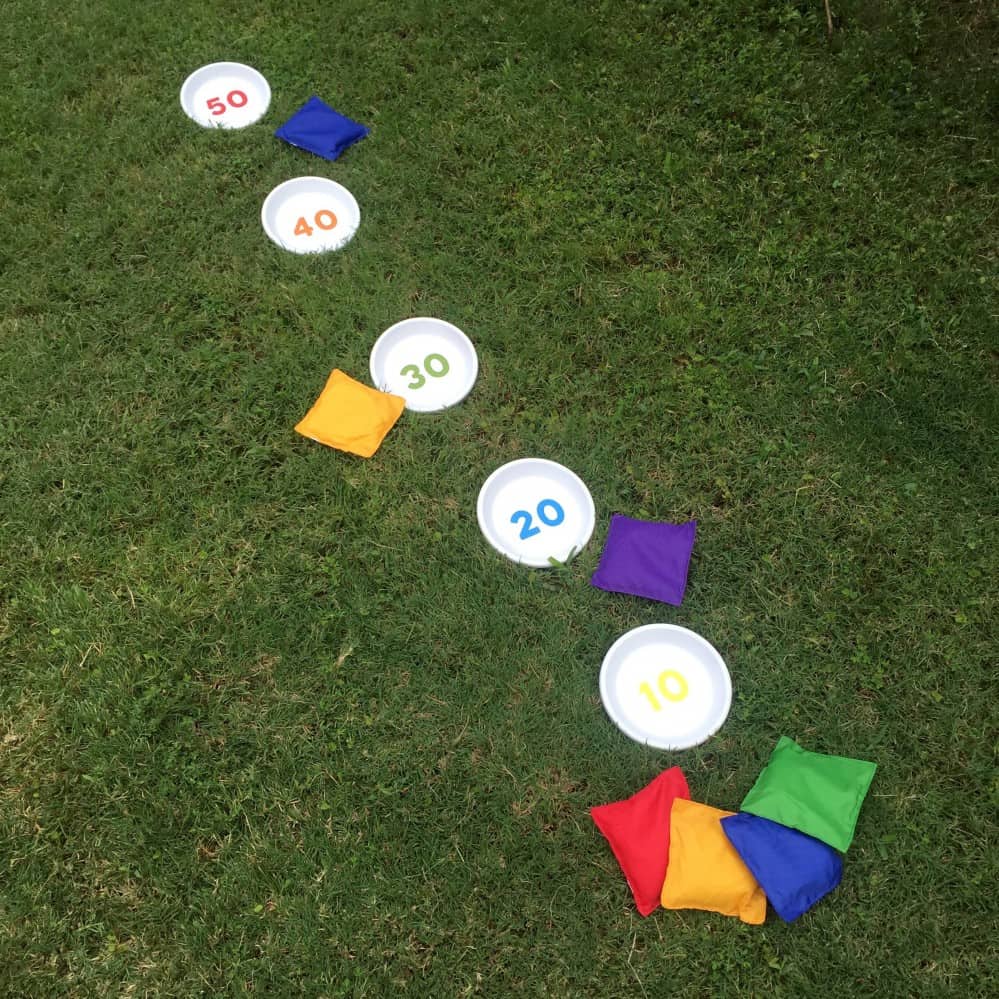
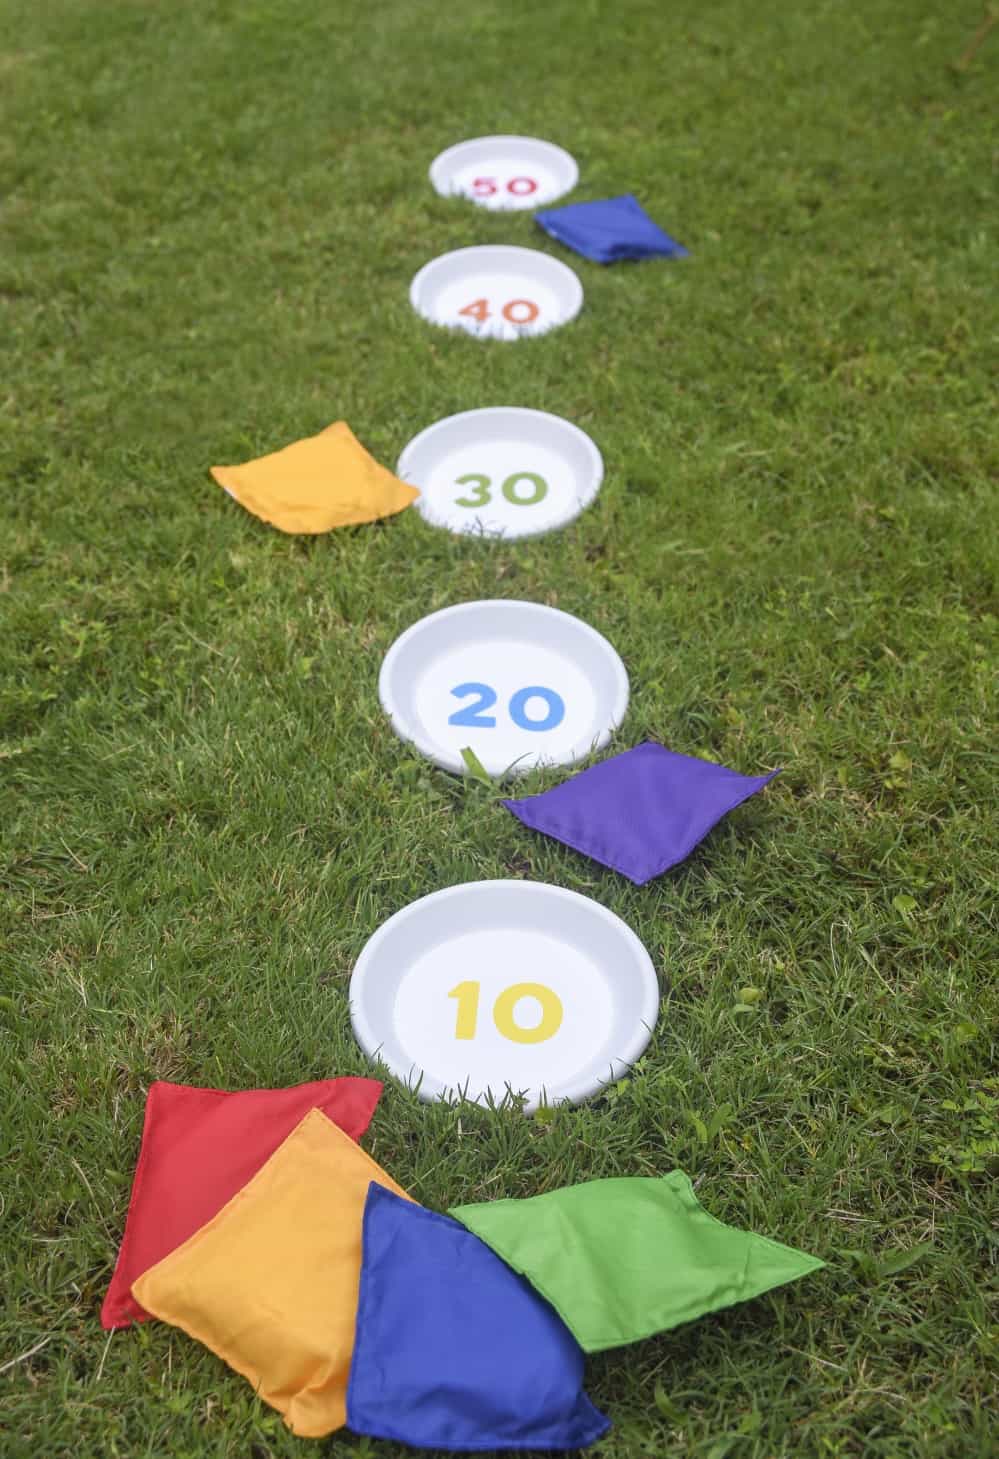
Print out the included bean bag toss printable on presentation paper (which is more durable), then cut out the circles using your scissors. I have provided point values of 10, 20, 30, 40, 50 and 100.
Working one number and saucer at a time, coat the back of the paper with a light layer of spray adhesive.
Smooth your number down inside the saucer until it’s completely adhered. Repeat with the other numbers.
To make a more permanent DIY bean bag toss game that will last year after year, adhere your numbers to the saucers using Mod Podge Outdoor as I described. If you don’t care if the game lasts more than one season, regular Mod Podge or spray adhesive are fine to use.
Take your DIY bean bag toss game outside and set the saucers as far apart as you like – you’ll find that it’s quite a fun challenge to play, and you’ll have a blast. I played with my neighbors and we got quite a little competition going! It was hilarious.
If you create this bean bag game, let me know in the comments. Also don’t forget to let me know who won ;D
DIY Bean Bag Toss
Yield: 1 game
Prep Time: 5 minutes
Active Time: 20 minutes
Total Time: 25 minutes
Difficulty: Easy
Estimated Cost: $20
Inspired by my childhood, I created a DIY bean bag toss game using clay saucers and a printable. This bean bag game is easy to assemble and you’ll have a blast!
Protect the work surface and place your clay saucers down. Spray them evenly with paint and let dry for at least 20 minutes. Turn over and repeat. Continue doing this until your saucers are evenly covered on both sides and dry.
Print out the included bean bag toss printable on presentation paper (which is more durable), then cut out the circles using your scissors. I have provided point values of 10, 20, 30, 40, 50 and 100.
Working one number and saucer at a time, coat the back of the paper with a light layer of spray adhesive.
Smooth your number down inside the saucer until it’s completely adhered. Repeat with the other numbers.
Seal the numbers to the terra cotta pot saucers with Mod Podge Outdoor or another water-resistant sealer. Let dry for 24 hours before using.
Notes
Always remember to use spray paint in a well ventilated area! To play, let each person take a turn with all bean bags. Add up the total score. Player with the largest score wins.