Are you curious how to Mod Podge fabric to wood furniture? This post will give you tips and tricks as well as sample projects!
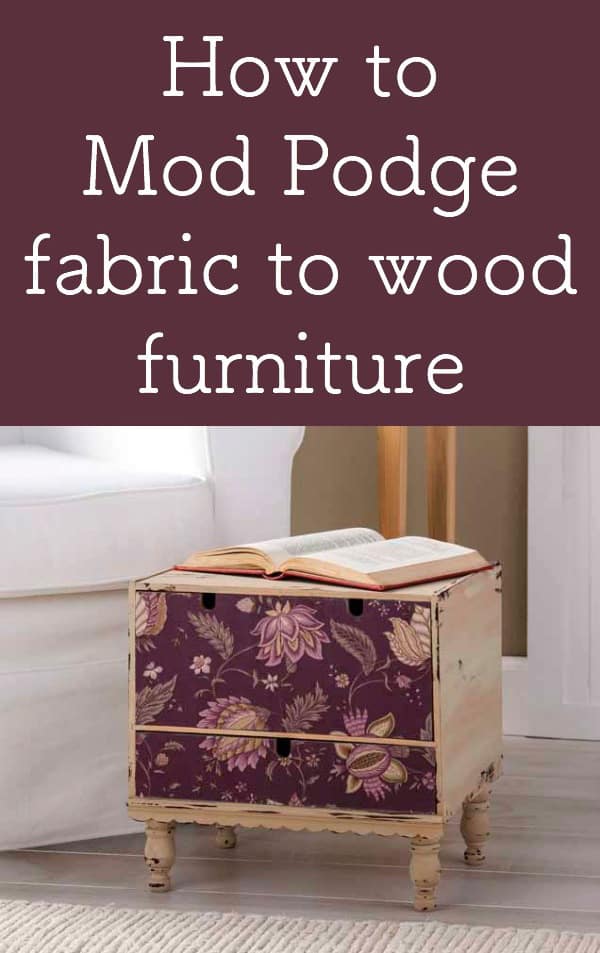 I get a lot of questions about re-doing furniture by Mod Podging fabric. If you want to Mod Podge fabric to wood, it's not as hard as it looks – and I wanted to give you some tips and share some projects that I think you'll enjoy.
What you should do first is watch this video. It's going to give you the basics of furniture decoupage (though it's done with paper). But it will help you get started. Take a peek:
So where do you begin? Now that you've decided to Mod Podge fabric on wood, you have to prepare the surface first. I completely explain how to prep furniture for decoupage so visit that post to get started. Preparing your piece for decoupage has an important impact on the end result. You want to make sure you do that correctly.
Once you've watched the video and read my article about prepping, you're ready to start decoupaging. I recommend you read the following tips and tricks next! I'm going to walk you through a project starting at step 1 . . . assuming you've already prepped your furniture.
Mod Podge Fabric to Wood Tips & Tricks
1. Basecoat your furniture with an appropriate color. Yes, you can decoupage on raw wood. You can also Mod Podge fabric to wood that is already painted.
Having said that, here's the issue: if you decoupage cotton fabric that is light on a surface that is dark underneath, you WILL see the paint through the fabric. LIGHT cotton fabric tends to become somewhat transparent when decoupage medium is applied.
So for example, if I were decoupaging a bookcase with a light yellow cotton fabric, I'd go with a light color like white or light yellow underneath.
Now, if your fabric is decorator's weight, you won't need to do this. The fabric is thick enough so that it won't show the paint below.
2. Wash and dry your fabric. Before you decoupage fabric to wood, you'll want to wash and dry it. People ask me all the time if they have to do this step. You don't have to. Having said that, you are taking a big risk if you don't.
This is because fabric has sizing in it and sometimes it can cause dark blotches. It doesn't always do that, but sometimes it does. Removing the sizing doesn't always solve the issue, but it really helps.
3. Use Hard Coat Mod Podge. A lot of the tutorials on my site for furniture were done before the invention of Furniture Mod Podge. But now that it's here – use it! It's the perfect formula for Mod Podge on wood.
4. Prepare the fabric with Mod Podge. I always place my fabric down on a piece of wax paper and brush Mod Podge on top of it. You can see the demonstration of that here. The reason for that is because it's easier to work with fabric that has been decoupaged.
It doesn't fray, and it takes on a less floppy, more paper like consistency. It's especially important when decoupaging large areas with fabric.
5.Decoupage both the wood and the back of the fabric. When you Mod Podge fabric to wood, you'll add decoupage medium to both the back of the fabric and the top of the wood.
6. Use a brayer. To go along with step 4, you'll want a brayer for smoothing your fabric down. You can do it without one, but I'm telling you – you want one. My favorite is this Mod Podge Tool Set. You have the brayer and then the squeegee is for inside corners (like on the inside of a drawer or tray).
7. Work slowly and in sections. You need to apply the Mod Podge quickly, but the overall project should be done slowly. Meaning, if you are applying fabric to a tabletop, do it in sections.
In your mind, divide the tabletop into four sections (for example). Decoupage one end of the fabric down – then work in sections to the other end – applying Mod Podge and smoothing down as you go.
Basically what I'm saying is: don't get crazy and try to decoupage one huge piece of fabric to the top of a tabletop at once. The Mod Podge is going to dry before you get it all down, and it's going to cause bubbles and be annoying.
8. Consider practicing. If you have a furniture piece you really don't want to ruin, think about using a $1 wood plaque from the craft store and a piece of scrap fabric to get comfortable. Practice makes perfect and – especially if you've never decoupaged before – you want to do it right!
9. Be ready for disaster. Of course the hope is that you do your project perfectly the first time. BUT if you place your fabric down and smooth and then find you don't like it – what do you do?? Rip up as soon as possible, sand, paint, and start over. It's going to be okay. I promise!
I'd love to hear your questions or tips for Mod Podging fabric to wood in the comments!
And for more fabric on wood furniture projects, visit these links:
- A fabric table mosaic
- Upcycled table with owl fabric
- Dresser repurposed with sheets
- Fabric coffee table
- Bright and cheery stool
The post How to Mod Podge Fabric to Wood Furnitur... appeared first on Mod Podge Rocks.